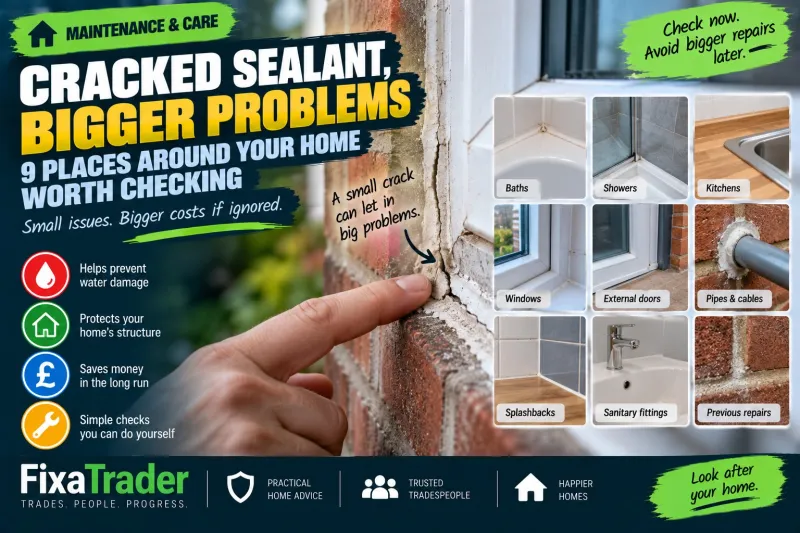
Cracked Sealant, Bigger Problems: 9 Places Around Your Home Worth Checking
Sealant is one of those things most homeowners barely notice. Until it fails. A thin line around a shower, window or worktop doesn't look particularly important...
Sealant is one of those things most homeowners barely notice.
Until it fails.
A thin line around a shower, window or worktop doesn't look particularly important. But in the right place, that small barrier is helping prevent water from reaching materials that were never intended to stay wet.
Over time, sealants can shrink, crack, separate, discolour or lose adhesion.
The good news is that many warning signs are visible before significant damage occurs.
Here are nine places worth checking around your home.1. Around Baths
The joint between a bath and the surrounding wall is an obvious place to start.
Look for:
Cracks.
Small gaps.
Sections pulling away.
Mould that repeatedly returns.
Or areas where the sealant feels loose.
Water escaping behind a bath can be difficult to notice immediately because much of the affected area may be hidden.
The first obvious sign might eventually appear somewhere else—such as staining on the ceiling below.
Don't assume a tiny visible gap can only allow a tiny amount of water through.
Repeated exposure matters.2. Around Shower Trays and Enclosures
Showers repeatedly expose joints to water, warmth, cleaning products and movement.
Pay particular attention to where the tray meets surrounding surfaces and the relevant sealed joints around the enclosure.
If sealant has separated, don't simply add another layer over the top without understanding why it failed.
Sometimes the old material has simply reached the end of its useful life.
But recurring failure can potentially indicate movement or another underlying problem.
Replacing sealant won't fix a shower tray that's moving excessively.3. Around Kitchen Worktops and Sinks
The small joint where a worktop meets a wall can prevent water from finding its way behind cabinets.
Likewise, check appropriate sealed areas around sinks.
This is especially important with materials that can swell or deteriorate after repeated moisture exposure.
Look for areas where water regularly collects.
A joint might look reasonable when dry but open slightly when pressed or when surrounding materials move.
Catching deterioration early can be much easier than dealing with a damaged worktop later.4. Around Windows
Window seals can involve several different components, so avoid treating every visible line as something that simply needs a tube of silicone.
From inside, look for obvious deterioration around relevant perimeter joints.
Externally, where safely visible from ground level, look for cracks, gaps or areas where sealing materials have separated from the frame or surrounding building material.
But remember:
Water appearing near a window doesn't automatically mean failed sealant.
It could involve condensation, drainage, surrounding masonry, flashing, the window installation or another source entirely.
Find the route the water is taking before assuming you've found the fix.5. Around External Doors
External door frames are another transition between different materials.
Those joints experience:
Rain.
Sunlight.
Temperature changes.
Movement.
And repeated opening and closing.
Look around accessible perimeter joints for obvious gaps or deterioration.
If you're also experiencing draughts, don't immediately cover every opening with sealant. Doors contain intentional drainage and ventilation features in some designs, and other components such as weather seals may be responsible.
Seal the things that are supposed to be sealed—not every gap you can find.6. Around Pipes Entering the Building
Pipes and cables often pass through external walls.
The penetrations around them should be appropriately finished for the particular construction.
From ground level, look for obvious gaps where services enter the property.
These can potentially provide routes for water, draughts and even pests depending on the circumstances.
But be cautious around boiler flues, electrical equipment, gas installations and other specialist components.
Don't start applying products around something when you don't understand its clearance, ventilation or installation requirements.
Some areas are jobs for the relevant competent trade.7. Around Splashbacks
Kitchen and bathroom splashbacks sit exactly where you'd expect water to appear.
Check the lower edge and relevant joints around them.
If the seal has failed, water can potentially travel behind the splashback rather than remaining on the visible surface where it can be wiped away.
Recurring mould or discolouration along one section may be worth investigating rather than repeatedly cleaning.
Again, the objective is not merely to make the line look new.
It's to maintain the joint's intended function.8. Around Sanitary Fittings
Depending on how they're installed, basins, toilets and other sanitary fittings may have sealed joints that should remain in good condition.
Check for obvious separation or deterioration.
But if something has become loose or is moving, don't assume new sealant is the solution.
Sealant shouldn't be used as a substitute for proper mechanical fixing where fixing is required.
If a basin moves every time it's used, adding more silicone around it may hide the symptom without solving the reason it moves.9. Around Previous Repairs
This is an easy one to forget.
Think about areas that have leaked or been repaired before.
Perhaps:
A shower was resealed.
A window had water ingress.
A pipe penetration was repaired.
A worktop joint failed.
Or an exterior crack was treated.
Check those areas occasionally.
A previous repair doesn't mean the problem will return, but you already know the location has a history.
If deterioration starts again, catching it early gives you a chance to establish whether the repair itself has failed or whether something else is causing repeated movement or moisture.What Does Failed Sealant Actually Look Like?
You don't need specialist equipment for a basic visual check.
Look for:
Cracking — visible splits through the material.
Separation — the sealant has pulled away from one side of the joint.
Shrinking — the bead no longer fills the space properly.
Missing sections — pieces have broken or peeled away.
Persistent mould or staining — particularly where cleaning doesn't resolve it.
Loss of flexibility — old material may become hard or brittle.
One failed area doesn't necessarily mean every sealed joint in the property needs replacing.
Focus on condition rather than age alone.Can You Just Put New Sealant Over Old Sealant?
Usually, simply covering failed material with another thick layer isn't the best approach.
The new material needs an appropriate surface to adhere to, and covering deterioration can leave the original failure underneath.
Proper resealing may involve removing unsuitable old material, preparing and drying the surfaces and applying a suitable product correctly.
The exact method and product depend on the location and materials involved.
A bathroom joint and an external building joint don't necessarily require the same sealant.
“Silicone is silicone” isn't a particularly useful rule.Why Does Sealant Keep Cracking?
If you've resealed the same joint three times and it keeps failing, stop treating it as purely a sealant problem.
Ask what's moving.
Possible contributors can include movement between materials, poor preparation, unsuitable products, incorrect application or a joint that wasn't appropriately designed for the conditions.
Persistent failure is information.
Sometimes the correct repair is fixing the reason the joint keeps opening rather than applying a fourth bead over it.A Five-Minute Check Can Be Worth Doing
You don't need to inspect every millimetre of your house every weekend.
Every so often—and particularly before wetter months—walk around the obvious moisture-prone areas.
Check the bath.
Look around the shower.
Inspect the sink and worktops.
Look at accessible windows and doors.
Notice whether anything has changed.
Most of the time, you'll find nothing interesting.
That's a good result.
But finding a deteriorating joint before water damages plasterboard, timber, decoration or cabinetry can turn a much larger repair into routine maintenance.
Sealant may only occupy a few millimetres of your home, but in the right place those few millimetres can be doing a very important job.
0 Comments
No comments yet — be the first to share your thoughts.