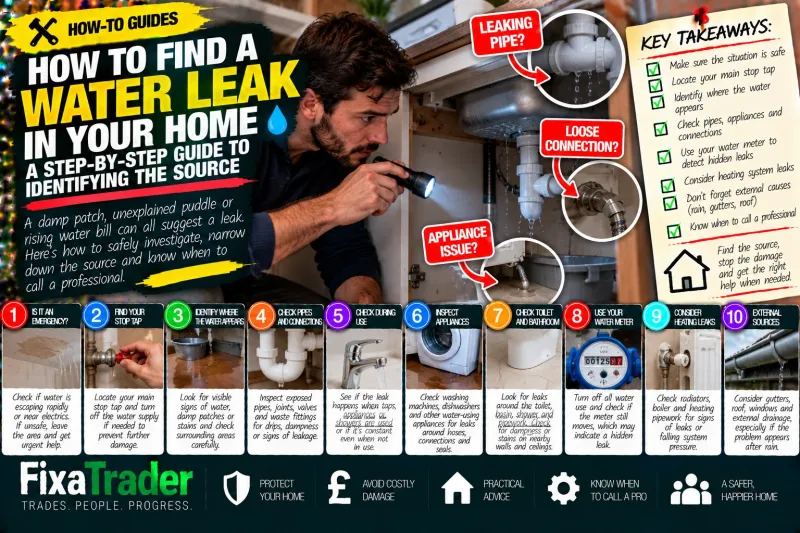
How to Find a Water Leak in Your Home: A Step-by-Step Guide to Identifying the Source
You notice a damp patch beneath the kitchen sink. Or perhaps there's a mysterious puddle beside the washing machine. Maybe the water bill has increased, but not...
Or perhaps there's a mysterious puddle beside the washing machine.
Maybe the water bill has increased, but nothing about your daily routine has changed.
The first instinct is usually to look for the nearest pipe.
But water doesn't always appear where the leak actually begins.
It can travel along pipework, behind cupboards, beneath flooring and through building materials before becoming visible.
That makes finding a leak more complicated than simply following the wet patch.
Fortunately, there are several straightforward checks homeowners can carry out without dismantling plumbing or damaging their property.
The key is approaching the problem systematically.
Find the evidence, narrow down the source and avoid making the situation worse.Step 1. Decide Whether the Leak Is an Emergency
Before investigating anything, establish whether the situation is safe.
A slow drip beneath a sink is very different from water pouring through a ceiling.
Treat the situation as urgent if:
Water is escaping rapidly or causing significant damage.
Water is near electrical sockets, switches or appliances.
A ceiling is bulging or visibly sagging.
Water is entering the property in large quantities.
You cannot control the flow of water.
If water is close to electrical equipment, don't touch wet switches, sockets or appliances.
Only isolate electricity if you can do so safely from a dry location without approaching the hazard.
If there's immediate danger, leave the affected area and seek emergency assistance.
For an active plumbing leak, the next priority is usually stopping the water supply.Step 2. Locate Your Main Stop Tap
Every homeowner should know where their property's internal stop tap is located.
It's the valve used to shut off the incoming mains water supply.
Common locations include:
Under the kitchen sink.
Inside a utility cupboard.
Beneath the stairs.
Near where the incoming water pipe enters the property.
Or in another accessible service area.
The location varies between buildings.
In flats, the arrangement may be different, with an individual isolation valve serving the property.
If you're dealing with an uncontrolled leak from the mains-fed plumbing, turning off the appropriate stop tap can help limit further damage.
Don't force a seized valve.
If it won't operate, contact an appropriate plumber or emergency service provider.
Important: Turning off the incoming mains supply won't necessarily stop every possible source of water immediately. Stored water, heating systems and certain other arrangements may continue releasing water.Step 3. Identify Exactly Where the Water Appears
Once the situation is safe, inspect the affected area.
Start by identifying the first visible sign.
Is there:
A puddle?
A damp wall?
Water dripping from a pipe?
Moisture beneath an appliance?
A stain on the ceiling?
Or a wet patch beneath the floor covering?
Look carefully at the surrounding area without removing fixed electrical equipment or opening building structures.
Use a torch if visibility is poor.
Take photographs before moving items where practical.
Remember that the visible water may be some distance from its source.
A leak behind a kitchen unit could travel along the base before appearing beside the dishwasher.
Similarly, water entering through a roof may run along structural components before reaching the ceiling.Step 4. Check Exposed Pipes and Connections
If the leak appears to involve plumbing, start with accessible pipework.
Under sinks and inside suitable service cupboards are useful places to inspect.
Look around:
Pipe joints.
Flexible tap connectors.
Isolation valves.
Waste connections.
Traps.
And visible pipe sections.
Signs of leakage may include droplets, staining, corrosion, mineral deposits or persistent dampness.
If the area is safe and the water flow is controlled, you can sometimes use a dry tissue against an accessible connection to help identify a slow drip.
Avoid disturbing joints or attempting to tighten unfamiliar fittings.
A connection that looks loose isn't necessarily something you should adjust without understanding how it's assembled.
Overtightening can damage seals or fittings and potentially make the leak worse.Step 5. Work Out Whether It Happens During Use
One of the most useful ways to narrow down a leak is observing when it appears.
For example:
Water appears whenever the tap runs.
That may point towards the tap, supply connections or waste arrangement.
Water appears only when the sink empties.
The waste pipe or trap becomes more relevant.
Water appears while the washing machine operates.
The appliance connections, drainage or machine itself may need investigating.
Water appears continuously, even when nothing is being used.
A pressurised supply pipe or another continuously fed source may be involved.
These patterns are clues, not definitive diagnoses.
Don't repeatedly operate an appliance or fixture if doing so causes further damage or creates a safety risk.
The aim is to identify the relationship between water use and the leak, not to recreate a serious flood.Step 6. Inspect Appliances That Use Water
Washing machines, dishwashers and refrigerators with water connections can develop leaks.
If the surrounding area is dry and safe to inspect, look for visible signs of moisture around accessible connections.
Potential problem areas include:
Water supply hoses.
Drain hoses.
Connections beneath the sink.
Door seals.
And the floor beneath or beside the appliance.
Don't pull a heavy appliance forward if doing so could strain hoses, damage cables or expose you to electrical hazards.
Never reach behind a wet electrical appliance while it remains connected to power.
If you suspect an internal appliance fault, a suitable appliance repair professional may be needed.Step 7. Check the Toilet and Bathroom
Bathrooms contain several potential leak sources.
A toilet may leak from its supply connection, cistern or waste arrangement.
A basin may have a leaking tap connector or trap.
A shower can allow water to escape through plumbing connections, enclosure defects or failed waterproofing details.
Look for:
Water around the base of the toilet.
Dampness inside vanity units.
Staining on adjacent walls.
Loose or deteriorating finishes.
Water appearing outside the shower.
Or moisture on the ceiling below an upstairs bathroom.
A particularly useful distinction is whether the problem occurs during water use or after rainfall.
Don't assume that replacing visible silicone will fix every bathroom leak.
Water may be travelling from concealed pipework or another part of the installation.Step 8. Use Your Water Meter to Check for Possible Supply Leakage
If your property has a water meter, it may help identify an otherwise hidden leak.
This check is particularly useful when you've noticed unexplained water consumption.
First, make sure no water is intentionally being used.
Turn off taps and ensure appliances aren't filling or running.
If you have a suitable meter that can be read safely, record the reading.
Wait for a period without water use, then check again.
If the reading increases, water may still be passing through the meter.
That can suggest a leak or another source of consumption, such as a running toilet or automatically operating appliance.
However, meter movement doesn't tell you exactly where the problem is.
It also matters which pipes and systems the meter supplies.
Never enter an unsafe meter chamber or attempt to dismantle the meter.
If the result suggests a leak, your water supplier or plumber may be able to advise on the next steps.Step 9. Don't Overlook Heating System Leaks
Not every leak involves ordinary tap water.
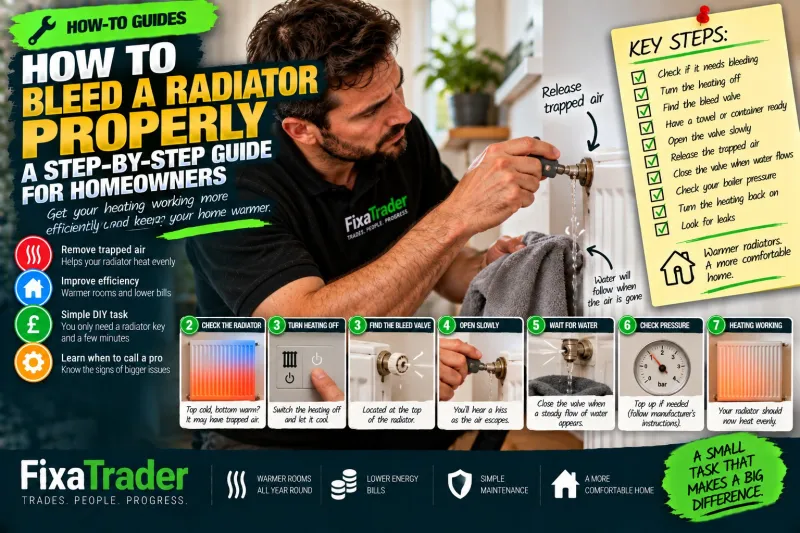
Central heating systems can also lose water.
You might notice:
A radiator valve dripping.
Water beneath a boiler.
Dampness around heating pipework.
Or repeated pressure loss on a sealed heating system.
A boiler that continually loses pressure may indicate a leak or another system fault.
However, pressure loss alone doesn't establish where the problem is.
Don't remove the boiler casing or interfere with internal components.
If a gas boiler requires work involving gas-related components, use an appropriately Gas Safe registered engineer.
For other heating system repairs, choose a suitably competent professional.
Be aware that turning off the property's incoming water supply may not immediately stop water escaping from a heating circuit.Step 10. Consider Whether the Water Is Coming From Outside
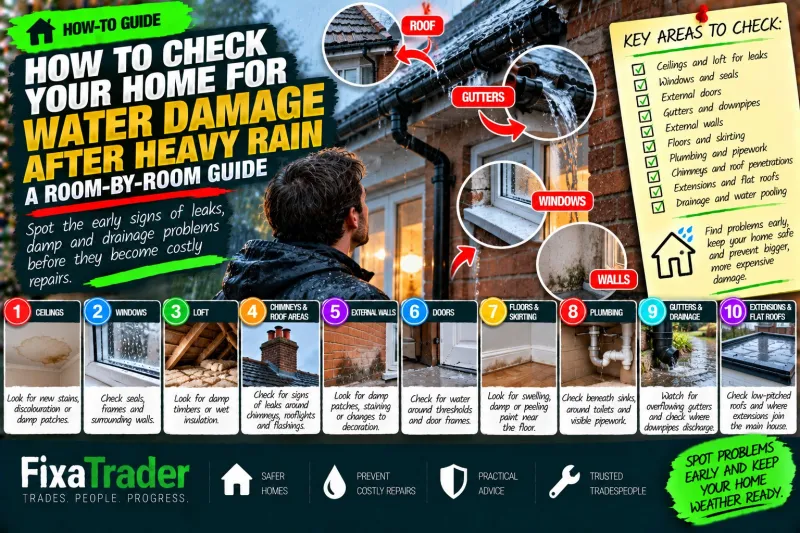
Sometimes the problem isn't plumbing at all.
A damp patch may appear after heavy rain.
Water could be entering around a window.
A gutter may be overflowing.
Roof defects may allow rainwater into the building.
Or external drainage could be directing water towards the property.
Look at the timing.
Does the dampness appear during rainfall?
Does it get worse during windy weather?
Does it disappear during dry periods?
Is the affected area close to an external wall, roof or window?
These observations can help distinguish a possible plumbing leak from rainwater ingress.
Avoid climbing onto roofs or ladders to investigate.
External defects should be assessed from a safe position or by an appropriate professional.How to Narrow Down a Leak Without Damaging Your Home
Once you've completed the initial checks, use the pattern of symptoms to decide what to investigate next.
What you've noticed | Possible area to investigate Water beneath a sink when draining | Waste trap or drainage connections Dripping beneath a tap even when unused | Supply connections or tap components Water appearing during a shower | Shower plumbing, enclosure or waterproofing Unexplained meter movement | Possible ongoing water consumption or supply leak Boiler pressure repeatedly falling | Heating system or boiler fault Damp patch appearing after rain | Roof, windows, gutters or external building fabric Water beneath a washing machine | Appliance, hoses or drainage connections
The table isn't a substitute for professional diagnosis.
It's a way to organise the evidence before deciding what to do next.Can You Use a Moisture Meter?
Moisture meters can sometimes help identify areas that may contain elevated moisture.
However, different instruments work in different ways.
Some provide comparative readings rather than a direct measurement of moisture content.
Readings can also be influenced by the material being tested and other conditions.
A high reading doesn't automatically tell you where the water originated.
If you're dealing with persistent or concealed dampness, professional investigation may be more useful than buying a meter and interpreting the results without context.Should You Remove Flooring or Open the Wall?
Not as your first step.
If you've found a damp patch but cannot identify the source, avoid immediately removing tiles, cutting plasterboard or lifting flooring.
You could damage:
Concealed electrical cables.
Pipes.
Waterproofing systems.
Or other building components.
Opening up may eventually be necessary, but it should be planned around the evidence.
For concealed leaks, plumbers and specialist leak-detection professionals may use appropriate equipment to help narrow down the location before carrying out intrusive work.
That can reduce unnecessary damage.What Should You Do Once You've Found the Leak?
The next step depends on the source and severity.
For a small, accessible leak, you may be able to prevent further water use and arrange a repair.
For an uncontrolled leak, isolating the relevant supply and seeking urgent professional assistance may be necessary.
Don't assume a temporary reduction in dripping means the problem has been permanently fixed.
If water has entered floors, walls or ceilings, those materials may also need assessment and drying.
Repairing the pipe is only one part of resolving the consequences.Document the Damage
If a leak has caused significant damage, take photographs where safe.
Record:
Where water appeared.
When you first noticed it.
Which rooms were affected.
Any visible damage.
And what steps were taken to limit further loss.
Keep relevant invoices and reports.
If you have home insurance, check your policy and contact your insurer where appropriate.
Coverage varies, and policies may distinguish between repairing the source of a leak and dealing with resulting damage.
Don't assume every part of the repair will automatically be covered.How Do You Know the Leak Has Actually Been Fixed?
A successful repair should address the source, not simply hide the symptom.
Depending on the problem, an appropriate professional may check that the repaired system operates correctly and no further leakage is occurring.
But the surrounding area may remain damp for some time.
Water-damaged materials don't necessarily dry immediately once the source has been repaired.
Continue monitoring the affected area.
If moisture returns, staining expands or a musty smell persists, further investigation may be required.
Avoid painting over damp patches or enclosing wet materials before the underlying issue has been addressed.When Should You Call a Professional?
Some water leaks are obvious.
Others can be surprisingly difficult to trace.
Consider professional help if:
You cannot identify the source.
Water is escaping rapidly.
The leak is concealed behind walls or beneath floors.
Electrical equipment may be affected.
A ceiling is damaged or sagging.
Heating system components are involved.
The same leak keeps returning.
Water damage is spreading.
You suspect a problem with underground or inaccessible pipework.
A plumber is often the appropriate starting point for suspected internal plumbing leaks.
A specialist leak-detection service may be useful for concealed problems.
If the evidence points towards rainwater ingress, a roofer or suitable building professional may be more appropriate.
Choose based on the likely source rather than simply the location of the wet patch.Finding the Leak Is About Following the Evidence
A leak doesn't always announce itself with water pouring from a broken pipe.
Sometimes it's a tiny drip.
An unexplained meter reading.
A damp cupboard.
Or a stain that appears only under particular conditions.
The most effective approach is to investigate systematically.
Start with safety.
Locate the stop tap.
Identify where water appears.
Check accessible connections.
Observe when the problem occurs.
Consider appliances, bathrooms and heating systems.
Use meter readings where appropriate.
And remember that rainwater can create symptoms that resemble plumbing leaks.
If the source remains unclear, don't start dismantling the property at random.
Get the right professional involved.
The place where water appears isn't always the place where the leak begins — follow the evidence, control the damage and find the cause before attempting the repair.
0 Comments
No comments yet — be the first to share your thoughts.