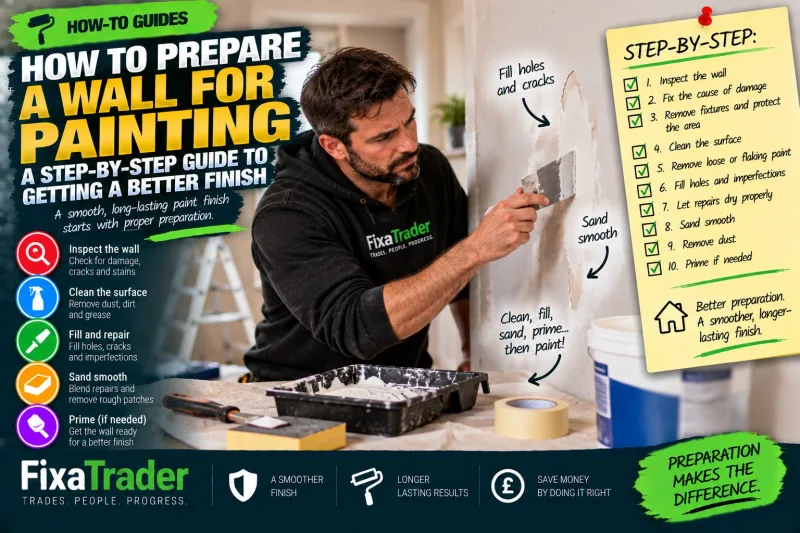
How to Prepare a Wall for Painting: A Step-by-Step Guide to Getting a Better Finish
Painting a wall seems simple. Open the tin. Load the roller. Start painting. But if you've ever finished decorating only to notice dents, cracks, rough patches...
But if you've ever finished decorating only to notice dents, cracks, rough patches or old marks showing through the new paint, you'll know the paint itself is only part of the job.
For many decorating projects, preparation has a bigger influence on the finished result than people expect.
Paint can change the colour of a wall.
It can't magically make a damaged or poorly prepared surface smooth.
So before reaching for the roller, here's how to get the wall ready.Step 1: Inspect the Wall Before Doing Anything
Start by looking carefully at the surface.
You're checking for things such as:
Cracks.
Small holes.
Loose or flaking paint.
Dents.
Stains.
Mould.
Damp patches.
Old fixings.
Uneven repairs.
Damaged plaster.
And anything else that might affect the finish.
Run your hand across areas that look questionable.
Something that appears smooth from across the room may feel very different up close.
This first inspection tells you how much preparation the wall actually needs.Step 2: Deal With the Cause of Damage First
This is particularly important.
If the wall has a damp patch, repeatedly painting over it isn't preparation.
It's hiding the symptom.
Likewise, if a crack keeps returning, it's worth understanding why rather than filling it every few months.
Before decorating, investigate unexplained moisture, significant or changing cracks, active leaks and other underlying problems.
There's little point creating a perfect finish over a problem that's going to damage it again.Step 3: Remove Anything You Don't Want Painted Around
Take down pictures and removable decorations.
Remove screws, hooks or wall plugs that are no longer required where appropriate.
Move furniture away from the work area.
Protect floors and anything remaining nearby.
Depending on what you're painting, removable faceplates or fittings may sometimes be dealt with appropriately rather than awkwardly painting around them—but don't dismantle electrical equipment or interfere with wiring unless you're competent to do so.
Preparation should make the job safer and easier, not create another problem.Step 4: Clean the Surface
Walls collect more contamination than they appear to.
Dust.
Fingerprints.
Cooking residue.
Grease.
General dirt.
And other deposits can affect how well new coatings adhere or how the finish appears.
Kitchen walls may need particular attention because airborne grease can accumulate over time.
Use a cleaning method suitable for the existing surface and the coating you intend to apply, following relevant product instructions.
Then allow the wall to dry properly before moving on.
Painting over a dirty surface is one of the easiest ways to undermine otherwise good work.Step 5: Remove Loose or Flaking Material
If old paint is already peeling away, covering it with another coat won't make the layer underneath secure.
Loose material needs appropriate attention.
The objective is to reach a sound surface rather than leaving unstable edges beneath the new finish.
Be careful with older properties and unknown coatings.
Historic paints and building materials can require additional precautions, particularly where hazardous substances may potentially be present.
If you're unsure what you're dealing with, don't aggressively sand or disturb an unidentified old coating simply because it looks flaky.Step 6: Fill Small Holes and Imperfections
Once the surface is clean and stable, deal with minor damage.
Small fixing holes and ordinary surface imperfections can often be repaired using an appropriate filler.
Follow the product instructions regarding:
Depth.
Application.
Drying time.
And whether more than one application is required.
Don't create an enormous mound of filler over a tiny hole.
A neat repair is much easier to finish afterwards.
For larger cracks, significant plaster damage or areas that repeatedly fail, a simple cosmetic filler may not be the appropriate solution.Step 7: Let Repairs Dry Properly
This is where impatience starts causing problems.
The filler looks dry.
You touch the surface.
It feels dry.
So you immediately paint it.
But drying time can depend on the product, depth of repair and conditions in the room.
Follow the manufacturer's guidance.
If a repair needs longer, give it longer.
Trying to save an hour during preparation can leave you staring at the consequences for several years.Step 8: Sand the Repairs Smooth
Once suitable repairs have dried, they may need sanding to blend them into the surrounding wall.
The aim isn't to sand the entire building into oblivion.
You're trying to remove obvious ridges and create a smooth transition between the repair and existing surface.
Use an appropriate abrasive for the task and avoid unnecessarily aggressive sanding.
Then look at the wall from different angles.
Side lighting can be particularly revealing.
A repair that seems invisible when viewed straight on may cast an obvious shadow when light travels across it.
Remember that sanding creates dust, so use appropriate precautions and clean the surface afterwards.Step 9: Remove the Dust
You've just created a beautifully smooth repair.
Now it's covered in fine dust.
Don't paint straight over it.
Remove sanding residue appropriately and make sure the surface is ready for coating.
Dust can interfere with adhesion and contaminate the finish.
This step takes very little time compared with the effort you've already spent repairing the wall.
Don't skip it at the last moment.Step 10: Decide Whether the Wall Needs Priming
Not every previously painted wall automatically needs the same primer treatment.
But certain surfaces or repairs may benefit from—or require—appropriate priming.
For example, you may be dealing with:
Bare plaster.
Filled areas.
Significant colour changes.
Porous surfaces.
Problematic stains.
Or a surface requiring a specific coating system.
The correct preparation depends on what's already on the wall and what you're applying next.
Follow the paint manufacturer's instructions rather than assuming one generic primer is suitable for everything.What About Fresh Plaster?
Fresh plaster deserves particular attention.
Don't treat a newly plastered wall exactly like an ordinary previously painted wall.
It needs to be sufficiently dry before decoration, and the initial coating system should be appropriate for new plaster and compatible with the chosen paint.
Follow the plasterer's advice where applicable and the coating manufacturer's instructions.
Applying unsuitable paint to plaster that isn't ready can create problems that would have been avoided by waiting and preparing correctly.What About Stains?
Some stains can reappear through ordinary decorative paint.
Simply adding more coats doesn't always solve the problem.
First identify what caused the stain.
If it came from an old leak, make sure the source has genuinely been repaired and the area has dried appropriately.
If the cause remains active, stain-blocking products won't fix the underlying problem.
Once the cause is resolved, an appropriate stain-blocking treatment may be required before normal decoration, depending on the contamination and coating system.What About Mould?
Don't simply paint over visible mould.
Mould indicates that conditions have allowed growth to occur.
That could involve condensation, ventilation, moisture or another underlying issue.
Address the cause and deal with the affected area appropriately before redecorating.
A tin labelled “mould resistant” isn't a substitute for fixing an active moisture problem.Check the Wall With Good Lighting
Before opening the paint, inspect your preparation one more time.
Natural daylight can reveal things artificial lighting hides.
A portable work light positioned across the surface can also make raised filler, dents and sanding marks much easier to see.
Ask yourself:
If I paint this exactly as it is, will I be happy seeing these imperfections afterwards?
Because paint—especially certain finishes and lighting conditions—can make imperfections more noticeable rather than less.Prepare the Edges Too
It's easy to concentrate on the large central area and forget the perimeter.
Look around:
Skirting boards.
Door frames.
Window reveals.
Corners.
Ceiling lines.
Sockets and switches.
Built-in furniture.
And other edges.
Old paint build-up, damaged sealant, cracks or untidy previous decorating can all become much more noticeable beside a fresh wall.
A good finish is often won around the edges.Don't Expect Paint to Fix the Surface
This is probably the most useful principle in the entire process.
Paint isn't filler.
It isn't plaster.
It isn't a damp repair.
And it isn't a structural repair.
If you can clearly see a defect before painting, there's a reasonable chance you'll still see it afterwards.
Sometimes more clearly.
Do the messy work while the room is already in preparation mode.
It's considerably more frustrating to discover the wall needs another repair after you've applied the final coat.When Should You Bring in a Professional?
Straightforward preparation and decorating can be accessible DIY work for many homeowners.
But consider professional help if you're dealing with:
Large areas of damaged plaster.
Persistent dampness.
Significant or changing cracks.
Extensive mould.
Unknown old coatings you're concerned about disturbing.
A very poor existing surface.
High or difficult-to-access areas.
Or simply a finish you don't feel confident achieving yourself.
A professional decorator also brings something that's difficult to capture in a checklist: experience recognising how a surface is likely to behave once it's coated.Preparation Isn't the Exciting Part—and That's Why It Gets Rushed
Nobody buys a new paint colour because they're excited to spend Saturday filling holes.
You want to see the transformation.
That's understandable.
But once the final coat dries, nobody sees how quickly you got the roller onto the wall.
They see the finish.
The smooth repairs.
The clean edges.
The absence of old cracks showing through.
And the consistency of the surface.
Spending longer preparing can feel as though you're delaying the real job.
In reality, preparation is part of the real job.
Don't judge whether a wall is ready by asking “Can I paint this now?” — ask “Am I happy for everything I can currently see to still be visible after I've painted it?”
0 Comments
No comments yet — be the first to share your thoughts.