How to Measure a Room Properly Before Ordering Flooring: A Simple Step-by-Step Guide
You've chosen the flooring. You've found the colour. You've compared the price. Now the website asks: How many square metres do you need? You look at the room....
Measuring for flooring isn't particularly complicated, but there are several places where people can go wrong—especially when a room isn't a perfect rectangle.
And there's an important distinction to understand from the beginning:
The size of your floor and the amount of flooring you need to buy aren't necessarily identical.
Here's how to approach it.Step 1: Get the Basic Equipment
You don't need much.
A suitable tape measure or laser measure.
Something to record the measurements.
A calculator.
And ideally a simple sketch of the room.
For straightforward rooms, that's enough.
Don't rely on remembering several measurements while walking around the house.
Write them down immediately and label what each number represents.Step 2: Measure the Length and Width
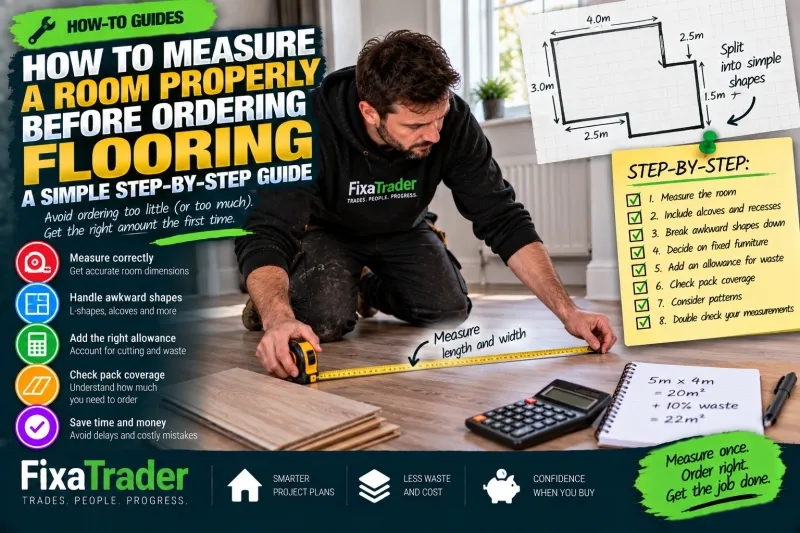
If the room is a simple rectangle, start by measuring its length and width.
For example:
Length: 5 metres
Width: 4 metres
Multiply them together:
5m × 4m = 20m²
So the basic floor area is 20 square metres.
That's the easy version.
Real houses, unfortunately, have a habit of being less cooperative.Step 3: Break Irregular Rooms Into Simple Shapes
Perhaps the room is L-shaped.
Don't try to invent one complicated calculation.
Divide the floor mentally—or on your sketch—into separate rectangles.
For example:
Main area: 5m × 4m = 20m²
Additional section: 2m × 1.5m = 3m²
Then add them together:
20m² + 3m² = 23m²
This approach works for many awkward layouts.
Break the space into areas you can measure easily, calculate each one and then combine them.
A rough sketch can make this much easier.Step 4: Don't Forget Alcoves and Recesses
This is an easy mistake.
You measure from one main wall to another but forget that the flooring also continues into:
A bay window.
An alcove.
A doorway recess.
A cupboard.
Or another small section of the room.
Individually, these areas may not look significant.
But several forgotten sections can be enough to leave you short.
Walk around the entire perimeter and compare it with your sketch.
Ask:
Is there anywhere the new flooring will go that I haven't included?Step 5: Decide What Happens Under Fixed Furniture
This depends on the room and flooring system.
For example, kitchen flooring raises an important question:
Will the flooring continue underneath the kitchen units, or stop around them?
Different products and installation methods can have different requirements.
Likewise, fitted wardrobes, islands, sanitary fittings and other permanent fixtures can affect what actually needs covering.
Don't automatically subtract every fixed object from the floor area.
First establish how the particular flooring is supposed to be installed.
If a professional is fitting it, ask them before ordering.Step 6: Measure More Than Once
This sounds almost insultingly simple.
It isn't.
A measurement written incorrectly by 50cm can make a surprisingly large difference across an entire room.
Measure again.
For important dimensions, checking from another point can also reveal whether the room is actually square.
Older properties in particular may contain walls that aren't perfectly parallel.
A room that looks rectangular might measure:
4.05m at one end
and
4.18m at the other.
If you blindly use the smaller measurement, you've created a problem before the flooring has even arrived.Step 7: Understand Why You Need More Than the Exact Floor Area
Suppose your calculated floor area is:
20m²
That doesn't necessarily mean you should order exactly 20m² of flooring.
Installation creates waste.
Pieces need cutting.
Offcuts can't always be reused.
Patterns may need aligning.
Boards or tiles may need positioning in particular ways.
Occasional pieces may also be unsuitable or damaged.
That's why flooring orders commonly include an allowance above the measured floor area.
But there isn't one universal percentage that's correct for every project.
The appropriate allowance depends on things such as:
The flooring type.
Room shape.
Installation pattern.
Board or tile dimensions.
And the manufacturer's recommendations.
A straightforward rectangular room with a simple installation can behave very differently from a complicated layout with lots of corners.Step 8: Pay Particular Attention to Patterns
This is where waste can increase considerably.
Suppose you're installing:
Herringbone flooring.
Patterned tiles.
A directional design.
Or another product that needs pieces aligned in a particular way.
You can't necessarily reuse every offcut wherever you like.
Maintaining the pattern can require additional material.
Before ordering, check the manufacturer's guidance for the particular product and installation pattern.
If you're using a professional fitter, this is an excellent time to ask:
“I've measured the room at 24m². How much would you like me to order?”
The answer may save you an expensive mistake.Step 9: Check How the Product Is Actually Sold
You've calculated that you need a certain amount.
Now look at the packaging.
Flooring is often sold by the pack rather than as an exact custom quantity.
For example, imagine each pack covers:
2.2m²
and you've established that the amount you need to order is:
22.8m²
Ten packs would provide:
22m²
That's not enough.
Eleven packs provide:
24.2m²
So your purchasing calculation needs to work with the actual coverage per pack.
Don't simply round your room measurement and assume the retailer will do the rest correctly.Step 10: Check the Measurements Against the Product Before Ordering
Before clicking Buy, bring everything together.
You should know:
Your calculated floor area.
The flooring product.
How it will be installed.
Any recommended waste allowance.
The coverage per pack.
The number of packs required.
And whether any additional matching material should reasonably be retained.
If a professional is installing the floor, consider having them confirm the quantity before you place a large order.
There's little benefit in saving money by purchasing the materials yourself if the job is then delayed because the quantity is wrong.What About Stairs?
Treat stairs separately.
Measuring flooring for a staircase can involve treads, risers, landings, winders and product-specific installation considerations.
Don't simply include the staircase in the square-metre figure for the hallway and hope there's enough left over.
If flooring is continuing onto stairs, measure and plan that part of the project specifically.
For more complicated staircases, professional measurement can be worthwhile.What About Flooring Across Several Rooms?
Measure each room individually.
Don't simply measure the overall footprint of one side of the house.
For example:
Living room: 18.4m²
Hallway: 6.2m²
Bedroom: 12.8m²
You can then combine the relevant areas where the same product is being used.
Keeping the measurements separate also makes it much easier to spot a mistake.
And if the flooring runs continuously between rooms, doorways and transitions need to be considered as part of the installation plan.Should You Subtract Small Areas?
Be careful about becoming too precise.
If there's a tiny section where flooring won't be installed, subtracting every last square centimetre may provide very little benefit—particularly when you're going to add an allowance for cutting and waste anyway.
The objective isn't to produce an architectural survey accurate to the millimetre.
It's to order a sensible quantity of material without accidentally running short or massively over-ordering.Don't Forget the Other Materials
Flooring itself may not be the only thing you need.
Depending on the product and installation, the job may also require things such as:
Underlay.
Adhesive.
Thresholds.
Trims.
Scotia or skirting arrangements.
Moisture-control products.
Floor preparation materials.
Or other accessories.
These aren't all calculated in exactly the same way as the flooring.
Check the installation requirements for the specific product rather than assuming the floor covering is the entire shopping list.Keep Some Spare Flooring
Once the installation is finished, don't automatically return or dispose of every usable leftover piece.
Keeping a small amount of the original flooring can be extremely useful.
Years later, a section may become damaged.
And by then:
The product may have been discontinued.
The colour may have changed.
The manufacturer may have altered the range.
Or a supposedly identical replacement may not match the existing floor particularly well.
A spare pack or several useful pieces stored appropriately can become surprisingly valuable.The Simple Formula
For a rectangular area, the basic calculation is:
Length × Width = Floor Area
For an irregular room:
Divide it into simple sections → calculate each section → add them together.
Then establish the appropriate additional allowance based on the flooring and installation method before converting the total into the number of packs you need.
That's really the process.
The mathematics isn't the difficult part.
The important part is making sure your measurements represent the whole area that's actually going to be covered.
Because discovering you've ordered too much is annoying.
Discovering you're one pack short when the fitter is halfway across the room is considerably worse.
Measure the room, plan the installation, check the product coverage and only then decide how much flooring to buy — because the floor area is the starting number, not always the final order quantity.
0 Comments
No comments yet — be the first to share your thoughts.